This article explains how to use the event editor tool to manage the details for an event including bookings and resources.
Overview
The event editor is the tool you use to change an event. It allows you to manage all aspects of the event, including adding or editing bookings and resources, sending confirmations, and managing invoice, payment, and deposit records, event notes, and communications with requesters. Along with the Add New Event function, the event editor is one of the main go-to tools in Mazévo.
Table of Contents
How Do You Get to the Event Editor?
Getting Started: A Quick look around
Working with Individual bookings
How Do You Get to the Event Editor?
When you open an existing event, it is displayed in the event editor. In addition, you can open an event using any of these tools:
- Find Events. Click the event's name you'd like to open or the > symbol at the end of the row.
- Event Book. Double-click an event or right-click and select Open.
- Event Calendar. Click the date to see a list of events, then click the event name.
- Activity Log. Click the event name in the list of results.
- Open Event. Type an event ID or select one recently opened event from the drop-down list.
- Add New Event. When you click Book Room(s) on the last panel of the process, the system opens the event editor.
Getting Started: A Quick Look Around
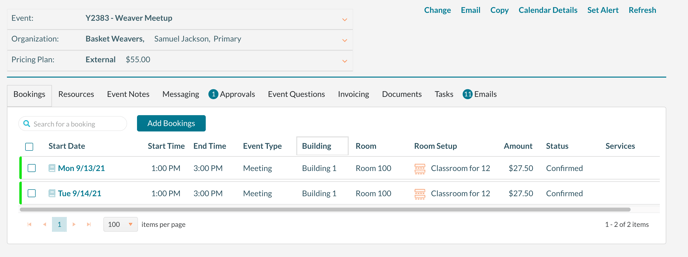
The event editor has two primary sections, the upper panel (above the separator line) and the lower panel (below the separator line). The upper panel displays summary information about the event, while the lower panel displays the list of bookings for the event and additional event details on a series of tabs.
Event panel:
Booking panel: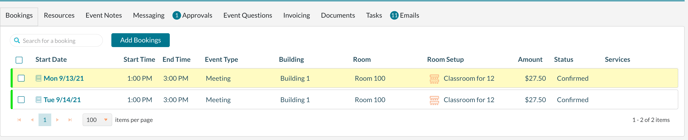
Event Panel
The upper panel displays important information about the event. Please note that some of these details may not be present based on system configuration and software licensing. These details include:
- Event ID and event name
- Organization and contacts
- Attendance
- Billing information
- Tools for sending the confirmation, copying an event, and editing event-level information
- Total charges for the event
Booking Panel
The booking panel comprises a series of tabs allowing quick access to all additional event details. The main tab, shown by default when you open an event, shows the list of current and future bookings for the event.
Tabs on the Booking Panel
Here is a quick overview of the tabs on the booking panel. Just so you know, some tabs may not be present in your system due to licensing or system configuration. For example, if you aren't licensed for invoicing, that tab will not be visible.- Bookings. Shows a list of bookings for the event. You can filter the list to hide old and/or canceled bookings.
- Resources. Shows a list of all resources for the event.
- Event Notes. It shows all of the notes related to the event. These notes are only displayed in the event editor.
- Messages. Shows the text conversations associated with the event. These conversations are typically between event planners and the primary contact for the event.
- Event Questions. You'd see the questions and answers on this tab if the event were generated from a request.
- Approvals. Event planners create approvals to track the additional permissions required for the event.
- Invoicing. Shows billing information for this event.
- Documents. Shows a list of documents that are associated with this event. Examples include Contacts and Insurance Certificates.
- Tasks. Shows tasks (reminders) for the event and bookings.
- Emails. Shows scheduled emails and all email history for the event.
Event panel
You can access three important tools from the event panel. Each is described below.
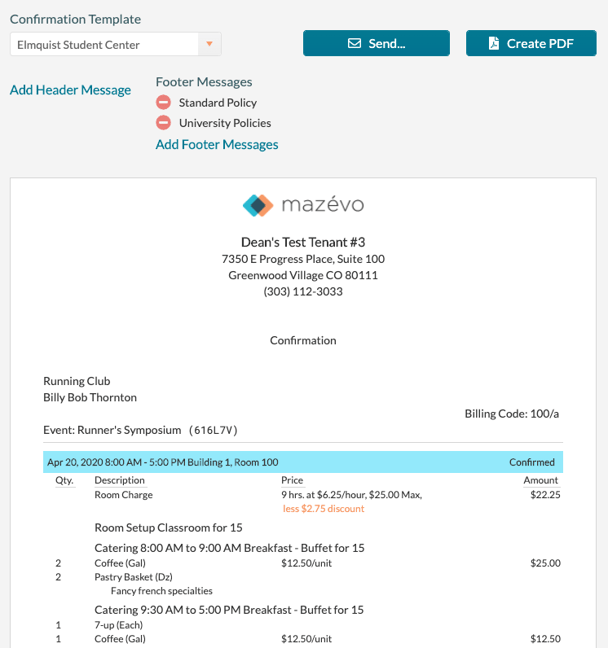
Send a Confirmation
To send a confirmation to one or more of the contacts on an event, click the Email button located in the upper right corner of the event panel. This generates a confirmation for all non-cancelled bookings and displays it for you to review and send or download as a PDF.

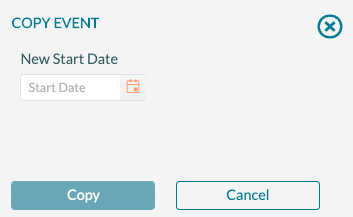
Copy Event
This tool is used to create an event that is exactly like an existing one. Rather than re-entering all of the event details, you can simply duplicate it.
To copy an event, you open it and click the Copy button the upper right corner of the event panel.
Then you specify a new starting date for the event and click Copy. Mazévo will copy all bookings that are not in a cancelled status.

Change Event
The last tool accessed from the event panel is the Change Event function. To open it, you click Change.
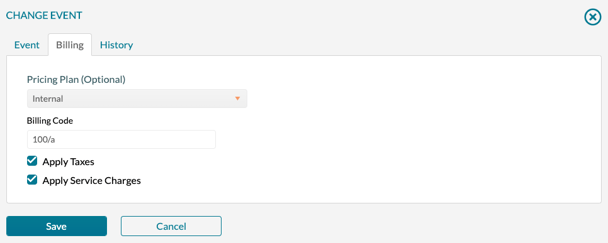
The Change Event screen has three tabs: Event, Billing, and History.
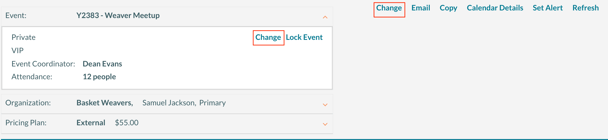

Event Tab
On this tab, you can edit any of the following information:
- Event name
- Private event (marks the entire event as private)
- VIP Event
- Event Coordinator(s) if they are defined in the system
- Organization
- Attendance
- Primary contact
- Other contacts (here you can add other contacts, either secondary or billing)
Secondary and billing contacts are able to view events from their mobile device or desktop. They can only view the event, while the primary contact can make modifications to the event like changing the time, date, or room, or adding resources.
Billing Tab
On the Billing tab, you can add or change the pricing plan or billing code, and check or clear the Apply Taxes and Apply Service Charges boxes.
History Tab
The History tab displays a detailed, field-by-field history of all changes to the main event record.

Booking Panel
The Booking panel consists of tabs that represent various groupings of event information. They are Bookings, Resources, Event Notes, Event Questions, Messaging, Approvals, Invoicing, Documents, and Emails.
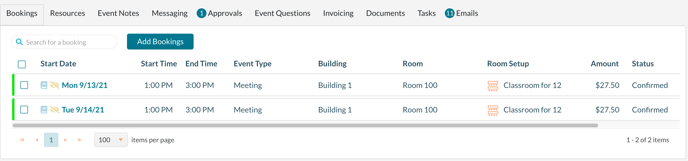
Bookings Tab
This tab displays a list of all bookings for the event. In addition, it has several tools an event planner can use to manage bookings. These tools are described below.
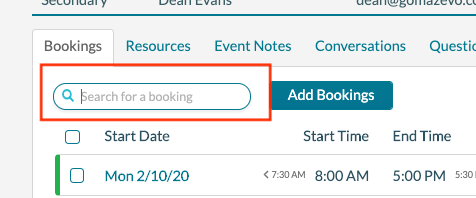
Filtering Bookings
There are three filtering options available on the Bookings tab.
Search for a booking. This filter limits the list of bookings to those rows in the display that contain the typed text.
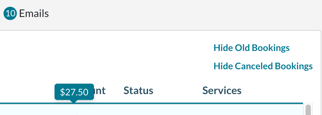
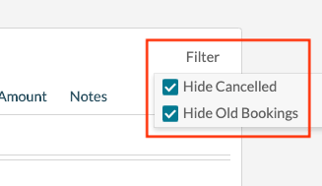
In the upper right corner of the list of bookings there are two Filter links: Hide Cancelled and Hide Old Bookings.
Hide Cancelled. Clicking this link removes cancelled booking from the display, regardless of the booking date.
Hide Old Bookings.Clicking this link removes past bookings from the display.
Sorting Bookings
The list of bookings is sorted by date and event start time by default. To change the sort order, simply click on one of the column headings. Clicking a column heading once sorts the grid by that column in ascending order. Clicking it a second time sorts the grid in descending order.
Adding New Bookings
If you need to add bookings to an event, click the Add Bookings button to be guided through the process, which is much like creating a new event.
Here is a video on adding new bookings.

Special Columns
There are several special columns in the grid that show important information in a condensed way.
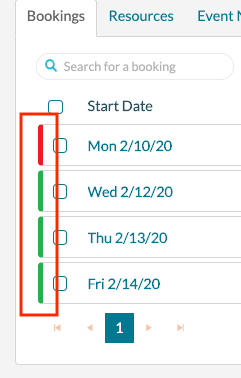
Status Indicator. On the left end of the list of bookings is a color indicator that represents the status of the booking. This is the same color that's displayed in the Event Book. There is also a column in the grid that displays the name of the status.
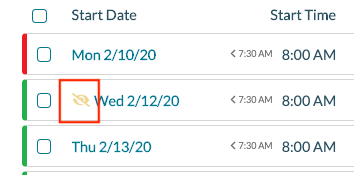
Private. An icon is displayed next to the booking date if the booking has been marked as private. If the event has been marked as private, the icon is shown next to every booking.
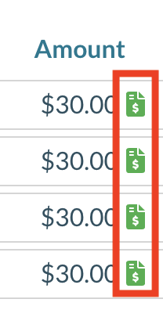
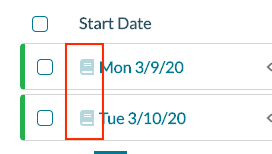
Service Icons. If the booking has resources, an icon that represents the service provider is displayed
.
Shared. An icon is displayed next to the booking date if the booking is sharing space with another booking.
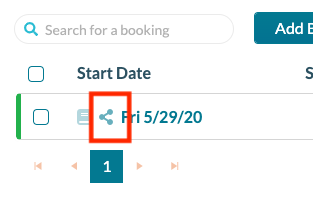
View in Event Book. Pressing this icon will open the Event Book to the date and room on the selected booking.
Invoiced. An icon will be displayed next to each room charge or resource charge that has been invoiced. Hovering over the amount will display the invoice number.

Booking Tools
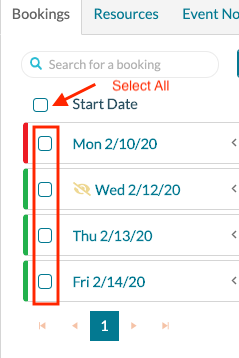
Several tools are available to the event planner for making changes to one or more bookings simultaneously. All of the tools start with the same step: selecting one or more bookings using the checkboxes on the bookings grid's left side. Just so you know, you can select all bookings at once by checking the box at the column's top.
Mazévo displays a new menu at the top of the display when you select one or more bookings.

Using any tool from this menu changes all of the selected bookings.
Change Bookings. This tool is used to change various information in the selected bookings. You can change the following:
- Status
- Room
- Times
- Date
- Event Type
- Event Name
- Room setup
- Price
- Setup Diagram
- Private indicator - Turn on or off the privacy setting for each booking
Add Resources. Add things like catering or equipment to the selected bookings.
Add Task. Add tasks to select bookings.
Reset Price. Resets the room pricing of all selected bookings to the current pricing plan for the event.
Email. Send a confirmation that includes only the selected bookings.
Copy. Copies the selected bookings to a new event, an existing event, or this event.
Move. Moves the selected bookings to a new event or an existing event.
Reports. Prints the Service Orders for the selected bookings or the Daily Operations report for the selected bookings.
Resources Tab
The Resources tab displays a list of all resources for the event. In addition, it has several tools for the event planner to manage resources. Each tool is described in detail below.
Filtering Resources
There are three filtering options available on the Resources tab.
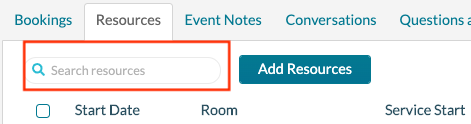
Search for a resource. This filter limits the list of resources to those rows in the display that contain the typed text.
In the upper right corner of the list of resources there is a Filter link. Hovering over or or clicking the link displays two options: Hide Cancelled and Hide Old Bookings.
Hide Old Bookings. Checking this box removes resources tied to past bookings from the list.
Hide Cancelled. Checking this box removes resources tied to cancelled bookings from the display, regardless of the booking date.
Sorting Resources
By default, the list of resources is sorted by date by location by service. To change the sort order, simply click on one of the column headings. Clicking a column heading once sorts the list by that column in ascending order. Clicking it a second time sorts the list in descending order.
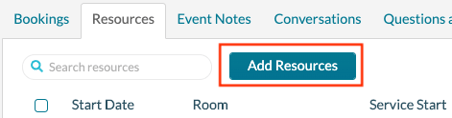
Adding New Resources
If you need to add resources to an event, click the Add Resources button and Mazévo guides you through the process.
Resource Tools
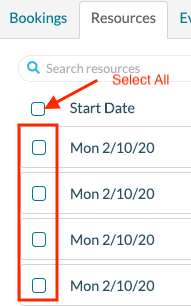
Many tools are available to the event planner for simultaneously making changes to one or more resources. These tools start with the same step: selecting one or more resources using the checkboxes on the left side of the display. In addition, you can select all resources at once using the check box at the top of the column.
When you select resources, the system displays a tools menu at the top of the list.
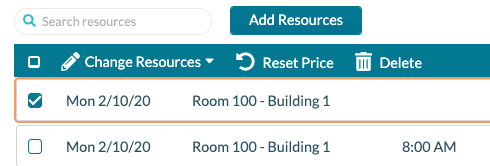
Change Resources. You use this option to modify various information related to the selected resources. You can change the following:
- Quantity
- Service time
- Notes
- Price
Reset Price. This tool resets all selected resources' prices to the pricing plan currently on the event.
Delete. This option deletes the selected resources.
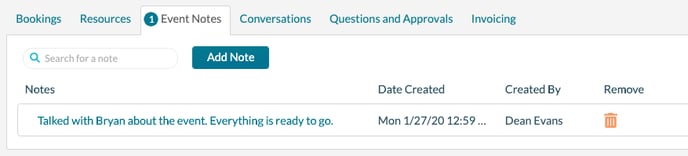
Event Notes Tab
Notes about an event are managed from the Event Notes tab. Event planners use event notes to record information about the event. Event notes are internal and can only be viewed by other event planners.
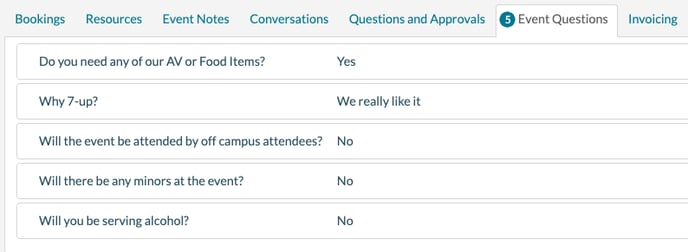
Event Questions Tab
If you take requests via the mobile or web tools, you can configure the system to prompt the requester for additional information about their event using Event Questions. The questions and answers are shown on the Event Questions tab.
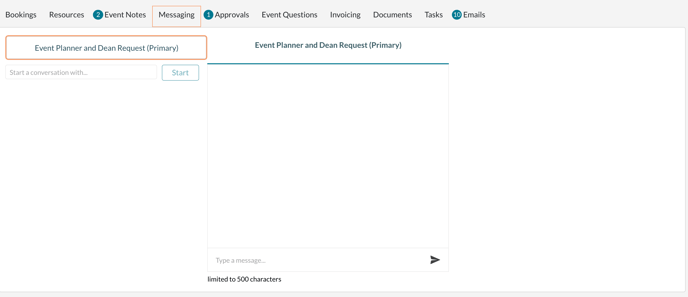
Messaging Tab
The messaging tab keeps a record of all messages to and from the requester for this event. All event planners can access the conversion history.
Approvals Tab
This tab displays all approvals and their current state. If there are no bookings in a pending request behavior status, an alert message will be displayed on this tab.
Approvals are only active when one or more bookings are in a pending request behavior status.

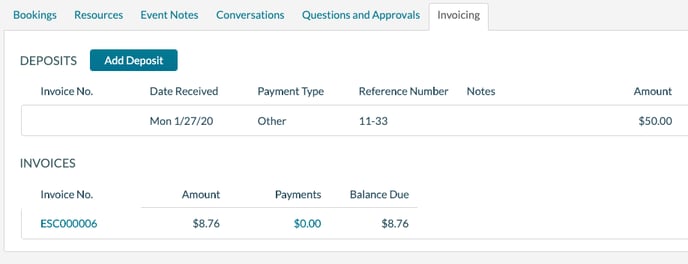
Invoicing Tab
All invoices created for an event are displayed on this tab in the Invoices section. Event planners can drill into invoices to see the details and resend the invoice via email. Deposits taken for an event are also shown here in the Deposits section.
Documents Tab
All documents that have been linked (or attached) to this event are displayed on this tab.
Tasks Tab
All tasks for the event and bookings are listed on this tab. You can add new tasks for the event or edit any task tied to the event or any bookings from this tab.
Emails Tab
The email tab lists all scheduled emails assigned to the event. You can also add new scheduled emails from this tab. In addition, all emails sent from Mazévo for this event are displayed.
Working with Individual Bookings
Several tools are available when you open a specific booking from the bookings grid. To open a booking, click the booking start date.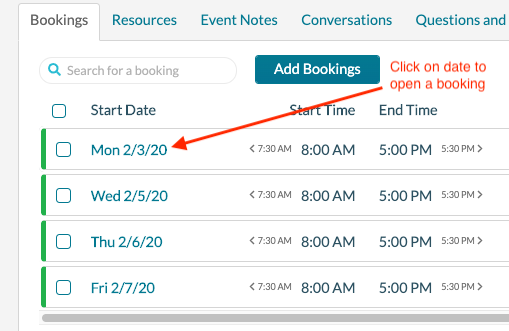
The system then displays detailed information for the booking. That includes charges, taxes, and service charges.
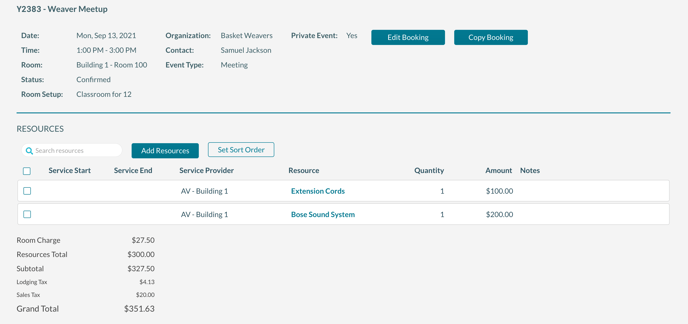
On this screen, you can perform several functions.
Edit Booking
Click the Edit Booking button to modify booking information like date, time, room, setup, and status.
After making changes, click Save.

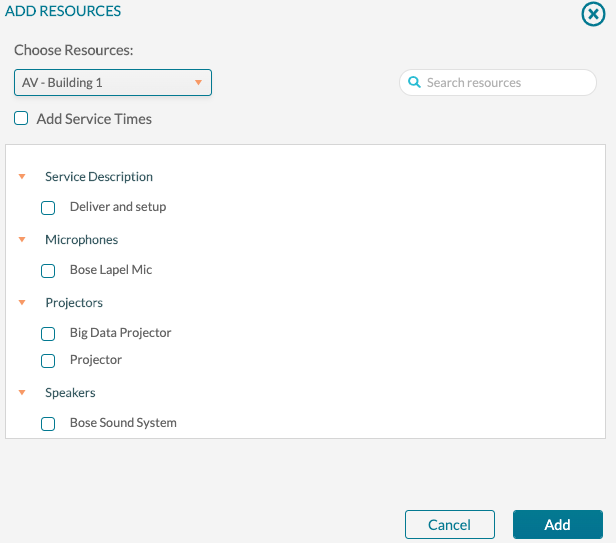
Add Resources
To add resources to a booking, click Add Resources.
Edit Multiple Resources
Just like working with bookings on the Bookings tab or resources on the Resource tab, you can select one or more resources by checking the associated box. Mazévo then displays a menu with these functions:
- Change Quantity
- Change Service Times
- Change Notes
- Change Price
- Delete