Overview
If you have a set of rooms that you allow requesters to book, and those rooms always have the same booking rules for all requesters (e.g., how far into the future they can request the room), adding these rooms to a Global Room Security Group allows you to maintain the list of rooms and the associated booking rules in one place.
A Global Room Security Group, which defines the rooms and the booking rules, can be tied to any security policy. Once a room is assigned to a Global Room Security Group, the room will not be available to assign to a normal room security group that is defined in a security policy.
Any changes to the rooms or the rules of a Global Room Security Group are applied to all of the policies that use/reference the Global Room Security Group.
Global Room Security Groups are only available if you have the advanced security feature turned on for your Mazévo installation.
Rooms tied to a global room security group can not be used on another global group or any group defined for a policy. The global group will control the room's behavior.
Creating a Global Room Security Group
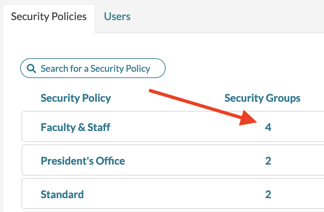
1. Navigate to Settings > Security Policies.
2. Press the Global Room Security Groups button at the top of the page.
3. Click Add Room Security Group.
4. Enter the following information on the Details tab:
- Description
- Notes
- Request Mode - Determines if the bookings created for rooms tied to this group are requests or self-service events. Self-service events do not go through the requesting process.
- Status for New Bookings - If the mode is Request, select a status tied to the request behavior of Pending. If you define the group for Reserve mode, select a status tied to a Booked request behavior.
- Status for Booking Changes - If the mode is Request, select a status tied to the request behavior of Pending. If you define the group for Request mode, select a status tied to a Booked request behavior. The status selected for booking changes can be the same as new bookings. However, you can have a separate status to indicate that the booking has been changed.
- Status for Canceled Bookings - Select the status for the bookings that the requester cancels.
- If this group will be limited to the time of day for new bookings, check the box for Booking Time Frame and enter the starting and ending times. Bookings can only be added or changed within these boundaries.
- If you require that new bookings are only allowed within a certain number of hours before the booking start, check the Earliest Booking box and enter how many hours before the start time. For example, if you need 24 hours notice before an event, entering 24 will prevent new bookings within the 24-hour window. Earliest Booking hours apply to new bookings, booking changes, and booking cancellations.
- If you restrict how far out into the future the requester can request, check the Last Booking box and enter either the maximum number of days or the hard cutoff date.
- If you need to restrict the maximum duration of bookings, check the Max Time Block box and enter the maximum number of minutes for a booking. This time does not include setup and teardown time.
- If you need to restrict the total number of hours of bookings per day, check the Max Daily Hours and enter the maximum number of hours allowed per day. This is the number of hours for all bookings for the user for a day.
- If you want to use a room sign for the check-in process, select this checkbox and enter the no-show status and the grace period for the check-in process.
5. On the Rooms tab, select the rooms that are tied to this global group.
6. Click Save.
If the rooms that you select for a global room security group are used on regular room security groups (defined for a security policy), they will be removed from the security policies that reference these rooms. There is no 'un-do' for this removal.
Assigning a Global Room Security Group to a Security Policy
If your installation of Mazévo uses advanced security features, you can create Global Room Security Groups and assign them to security policies. Once a global group is tied to a policy, all of the rooms assigned to that global group will be available to requesters tied to that security policy. Follow the steps below to assign a global group to a policy:
1. Navigate to Settings > Security Policies.
2. Locate the policy you want to add a global group to and click on the Security Groups column.
3. Navigate to the Global Room Security Groups tab.
4. Click Add Global Room Security Group.
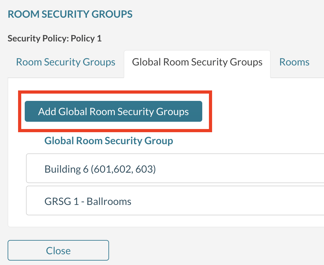
5. Select the global group from the dropdown box.
6. Press Save.