Overview
When an event planner creates an event, they can indicate whether it is public or private. By default, events are public. Event planners can also edit existing events to make them private. Private events are not displayed on the public calendar but in all other areas of the system.
Optionally, event planners can select individual bookings to be private rather than marking the entire event as private.
When an event is marked as private, all of the bookings will appear to be private. To make some bookings public, make the event public, and then set the appropriate bookings to private.
Making an Event Private When Creating It
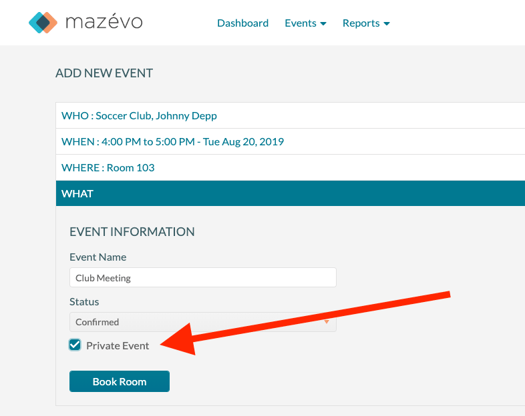
To make an event private when creating it, do the following:
- On the last screen of the Add New Event process, click the Private Event checkbox.
- Click Book Room.
Making an Existing Event Public or Private
To make an existing event public or private, do the following:
- Open the event and click Change.
- On the Event tab, click the Private Event checkbox to toggle its status as needed.
- Click Save.
Making a booking, Public or Private
To make an existing booking public or private, do the following:
To mark individual bookings as private, you must first remove the private flag from the overall event before marking bookings as private.
- Open the event, and from the list of bookings on the event, select one or more bookings to mark as private by checking the selection box on the left side of the bookings grid. After selecting the booking(s), choose Change Privacy from the menu.
- Select Private or Public and press Save.