Overview
There are two main questions that a security policy addresses:
- What locations can the user request?
- What are the allowed timeframes for making and editing requests?
Based on how your installation of Mazévo is configured, security policies are presented in one of two modes: standard and advanced. This mode is set by Mazévo support for your installation.
Regardless of the setting, a security policy dictates the requesting restrictions for all users assigned to it. A requester must be given a security policy to make requests.
If you are trying to test the changes to a security policy as a global administrator with the requester role, you'll need to log out and back into the system to test the changes.
The security policy is loaded during the login process for all users, so for any changes to take effect, they will need to log out and back in.
Advanced Security Mode
The main difference between standard and advanced security modes is creating "room security groups" for a policy. Here's an example scenario:
- Students can request meeting rooms, but we need at least two days' notice, and they can't book more than 30 days in advance.
- Students can book study spaces within the next 48 hours but can only use a room for two hours or less.
- Students can request lounge spaces, but only for use after 5 p.m. Again, we need at least two days' notice, and they can't book more than 45 days into the future.
Each rule above would be a room security group within a single security policy.
Each room security group defined for a security policy is then applied to one or more rooms. A room can only have one security group assigned to it.
To create an advanced security policy:
1. Navigate to Settings > Security Policies.

2. Click Add Security Policy and enter the following information:
On the details tab:

- The Name of the Policy.
- The email address to notify when new requests are created.
- Any Notes to describe the usage of this policy.
- If you use SSO and this policy is the default for new users, check Assign to New Users for Single Sign-on. A new user, authenticated through SSO, will be created as a Requester with this policy. Only one policy can be used as the default for new users.
- Optionally enter a Default Event Name. If a value is specified, the system will NOT prompt the user for an event name when creating new requests via Add New Request, the Event Book, or Book Room. This is useful for self-service (no approval necessary) requests. This value, if entered, overrides the user's default event name specified in Profile and Preference.
If there is not a default policy set, new users will be created as View-Only requesters, unless you are using SSO attributes to access the policy. However, if the attribute mappings are complete and the new user can not be mapped to a policy via the attributes, the user will be created as a View-Only requester. Mazevo will not change the role of a user from View-Only to Create Request.
On the Options tab, select the following options:

- Check/clear Limit number of bookings per event to indicate whether users assigned this policy will be limited to a maximum number of bookings for a new event.
- Select Show Billing Code to allow requesters to enter a billing code when making a new request. You can also make the Billing Code Required if you select this option.
- Checking Allow Requester to Specify Customer Access Time exposes a new set of start and end times for the requester. Customer Access time is the time required by the customer to set up for their event (decorating). This time is separate from the operation team's setup and teardown time.
- If you allow requesters to use the copy event tool, check Allow Copy Events.
- Organization is not required. This allows a new user to create a request without an organization assigned to the user's contact record.
- Select the menu options for users assigned to this policy
- Add New Request
- Event Book
- Book Room
- All Events
3. Click Save.
To manage rules for an advanced security policy:
After creating a new advanced security policy, you add rules to it.
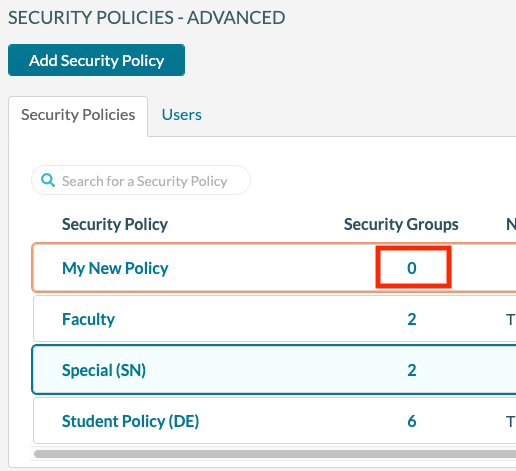
1. Click on the Security Groups column to manage the rules for a policy.
You will be on the following screen:

To create a room security group:
After selecting a security policy to manage, you can create new room security groups or edit existing groups.
1. Click Add Room Security Group.

2. Enter the following information:
- Name for the Room Security Group.
- Request Mode - Determines if the bookings created for rooms tied to this group are requests or self-service events. Self-service events do not go through the requesting process.
- Status for New Bookings - If the mode is Request, select a status tied to the request behavior of Pending. If the group you define is for Reserve mode, select a status tied to a Booked request behavior.
- Status for Booking Changes - If the mode is Request, select a status tied to the request behavior of Pending. If the group you define is for Reserve mode, select a status tied to a Booked request behavior. The status selected for booking changes can be the same as new bookings. However, you can have a separate status to indicate that the booking has been changed.
- Status for Canceled Bookings - Select the status for the bookings that the requester cancels.
- If this group will be limited to the time of day for new bookings, check the box for Booking Time Frame and enter the starting and ending times. Bookings can only be added or changed within these boundaries.
- If you require that new bookings are only allowed within a certain number of hours before the booking starts, check the Earliest Booking box and enter how many hours before the start time. For example, if you need 24 hours notice before an event, entering 24 will prevent new bookings within the 24-hour window. Earliest Booking hours apply to new bookings, booking changes, and cancellations.
- If you restrict how far out into the future the requester can request, check the Last Booking box and enter either the maximum number of days or the hard cutoff date.
- If you need to restrict the maximum duration of bookings, check the Max Time Block box and enter the maximum number of minutes for a booking. This time does not include setup and teardown time.
- If you need to restrict the total number of booking hours per day, check the Max Daily Hours and enter the maximum number of hours allowed per day. This is the number of hours for all bookings for the user for a day.
- If you need to restrict the total number of booking hours per week, check the Max Weekly Hours and enter the maximum number of hours allowed per week. This is the number of hours for all bookings for the user for a given week. Weeks run from Sunday to Saturday.
- If you need to restrict the total number of booking hours per month, check the Max Monthly Hours and enter the maximum number of hours allowed per month. This is the number of hours for all bookings for the user for a given month (from the 1st day of the month to the last day of the month).
3. Click Save.
To assign rooms to a security group:
After creating one or more security groups, you must assign rooms to them.
Note: You can only assign a room to one security group.

To assign a security policy to one or more users:
1. Click the Users tab to assign the policy to users.

2. Click the checkboxes to select users. On the toolbar that is then displayed, click Assign Security Policy, select the appropriate security policy, and click Save.

Copying a Security Policy (Advanced Mode)
You can copy a security policy and its associated groups by pressing the copy icon on the appropriate row in the grid. Copying a security policy will create a new policy with the name of the original policy appended with a numerical value.
